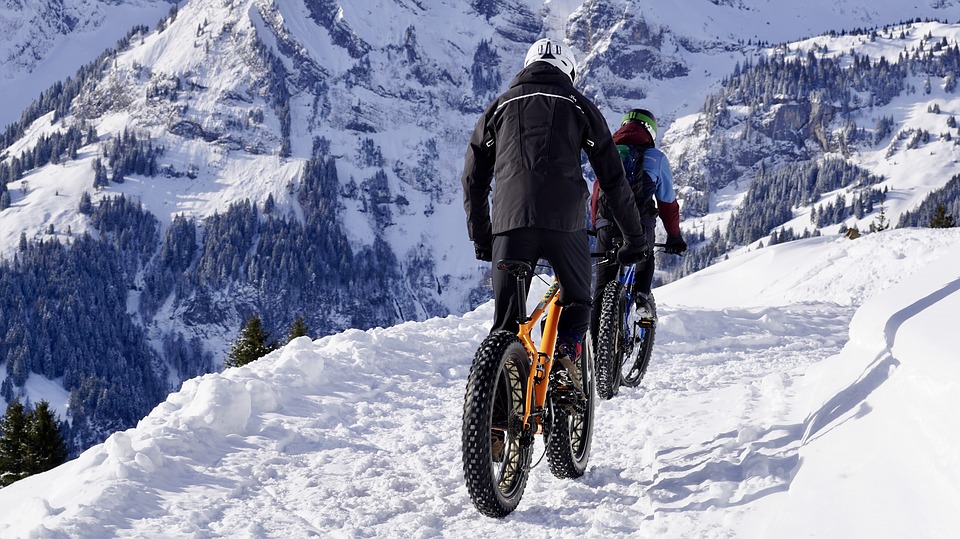
Repairing a mountain bike with your own hands
A modern mountain bike has a complicated device, and it provides a high level of comfort during riding even in very difficult conditions. Over time, the initial technical and performance characteristics of mountain bikes may deteriorate. In order to avoid such a negative development, preventive maintenance work should be carried out periodically, checking the condition of each, even the smallest, part.
Is it possible to repair a hard-tail mountain bike by yourself?
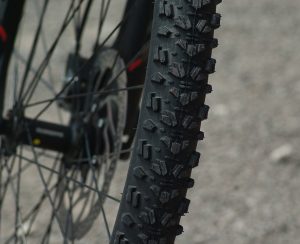
Remove the Wheels on a MTB
Removing the bicycle wheel is a basic action for any rider. The wheel has to be removed for a variety of reasons – repairing a punctured camera, removing the octagons (if the stand is used), adjusting and lubricating the bushings. You often have to remove the wheel when transporting your bicycle, such as on a train.
But many novice cyclists don’t really know how to do it. (Experienced riders, please don’t laugh).
Of course, it is more convenient to remove the wheels when the bike is turned upside down. There are no difficulties in turning your bicycle upside down (no need for a jack for jealous motorists), and your bicycle is stable enough on the handlebars and saddles. You just need to be more careful with the equipment on the steering tube – speedometers, flashlights, mannets. These items can easily be damaged on the floor/ground.
Happy owners of bicycles with disc hydraulic brakes should not forget that they are not advised to turn their bicycle upside down on the wheels for long periods of time, because air bubbles from the expansion tank can get into the hydraulic line. It’s no big deal, but once the bike is on the wheels, the brakes may have to be pumped. Also, do not press the hydraulic brake handles while your bicycle is standing without wheels – the pads may get so close that it will be difficult to put the wheel back in place.
If possible, start by installing the bike. It should be installed on the left side when you remove the rear wheel. Do not place the bicycle in an upright position without the rear wheel, as this could damage the rear derailleur.
1. Rear wheels: Install the derailleur to the outer gear and inner front wheel chain. This will loosen the chain, and the wheel will be easier to remove.
2: Disengage the brake rim, if fitted. The release mechanisms for typical MTB and road brakes are shown below.
Note:
Disengagement shoes are not required with disc brakes. Also, with hydraulic disc brakes, do not depress the brake lever when removing the disc from the bicycle. Otherwise, the brake pads will close and it will be very difficult to put the wheel back on your bicycle. Use a specially designed spacer, such as PP-1.2, if necessary.
3. disconnect the wheel from the frame:
- Eccentric mechanism for attaching wheel axles: Pull the lever of this mechanism outward to the end. If necessary, loosen the quick release of the adjusting nut to remove any protrusions at the end of the fork.
- Straight Axis: Some functions are similar to the axle of the eccentric wheel attachment mechanism – pull the lever out to release the wheel axle and turn it to release it. Some straight axles have a special device that should loosen the axle. However, other simple levers that are needed to loosen or tighten are not used.
- Solid axle: on wheel axles with nuts, both nuts must be loosened from the outside.
4. On the front wheel – just point the wheel down and out of the fork. For rear wheels – pull out the rear gearshift mechanism to have the screws clean the chain. Lower the wheel by pointing it down through the brake pads and forwards to clear the chain and gearshift mechanism.
Some gearshifts have a clutch mechanism that makes it difficult to turn them. They have functions that make it easy to remove the wheel.
- To clutch the SRAM gearshift mechanism, move the lower roller forward to loosen the chain and press the button to lock it in place.
- To clutch the Shimano’s gearshift mechanism, you must find the on/off lever and move it to the off position.
Is it possible to repair a mountain bike yourself?
Similar questions are asked by many owners of two-wheeled vehicles. And there is an explanation for that. Today, mountain bikes cost a lot of money. Not everyone can afford to change one vehicle for another without thinking about their financial costs. Therefore, the owners of mountain bikes try to carefully study all the nuances of the upcoming work. Many of them trust their property only to specialists who have had more than a dozen bikes.
More advanced mountain bike owners know that preventive measures and repair work can be handled by themselves, without the help of professionals. The most important thing – to have at hand the necessary tools for work (pliers, wire, glue, scissors, lubricants, brake fluid, and so on) and perfect understanding of the device of the bike.
Most repairs do not require experience. All you need to do is find the repair manual for your bicycle model. If you can’t find the manual, you can use the manual. Today on the Internet instructions and manuals are available for almost all models of two-wheeled vehicles.
Important
When assessing the condition of mountain bike parts, you should check them for deformation and damage. It is essential to lubricate all parts, see how secure they are attached to the general mechanism, remove accumulated dirt.
The braking system is an essential part of the design of your mountain bike. It is recommended that you check the brakes before using your vehicle. During maintenance work, it is very important to know the condition of the brake fluid. If it has become transparent or has a white-pink colour, it should be changed.